Steps:
1. EXPORTING THE .DAE FILE
2. THE .DAE FILE
3. IMPORT IN XCODE
4. CONVERT TO .SCN
We’ve recently been working on an AR version of a relatively well known “unstable block tower” game which we’ve decided to call Toppler. One of the very first steps we took was to design wooden blocks using Blender, and use them directly in SceneKit. I’m going to detail the process of exporting a 3D model as a .dae (digital asset exchange) file and how to use it with SceneKit. You might be inclined to think of it as an easy step, but there are a couple of things to watch out for, and the lack of documentation around this topic makes it especially challenging if you have not done it before.

1. Exporting the .dae file
I used Blender to craft the wooden block (I’ll skip the block creation steps, which could be the topic of a future post). The very last step you’ll take in Blender will be to export your creation.
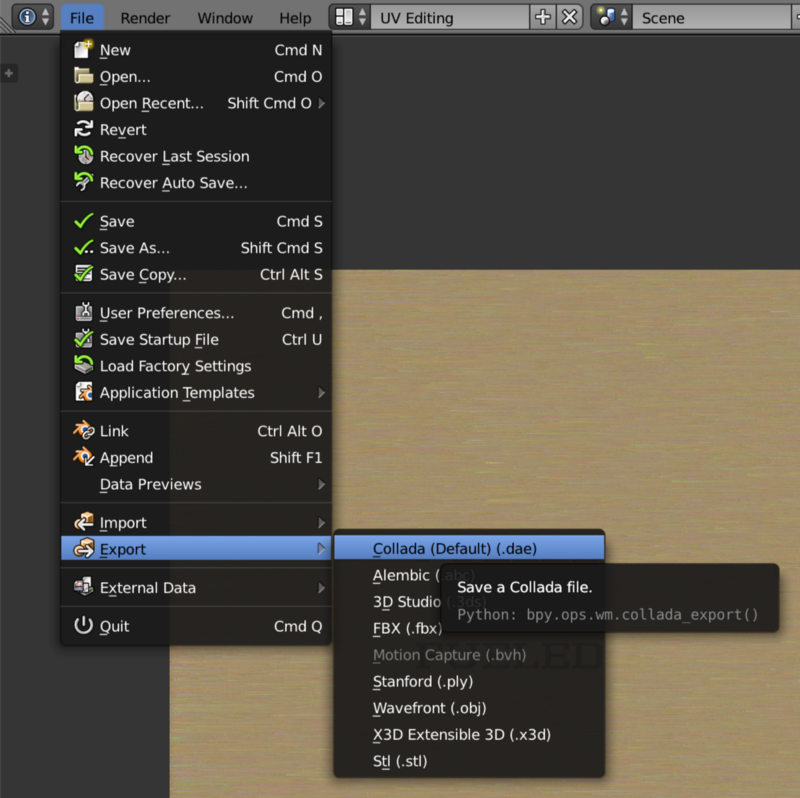
Classic menus, simply hit File > Export > Collada (.dae).
You’ll be presented with an export window with several options. The option we’ll be interested in is Selection Only. Leaving this unticked will export everything you have in your scene (eg: lights, cameras…). Here, we only want the wooden block to be exported, so we’ll make sure we previously had it selected, and we will tick this option.
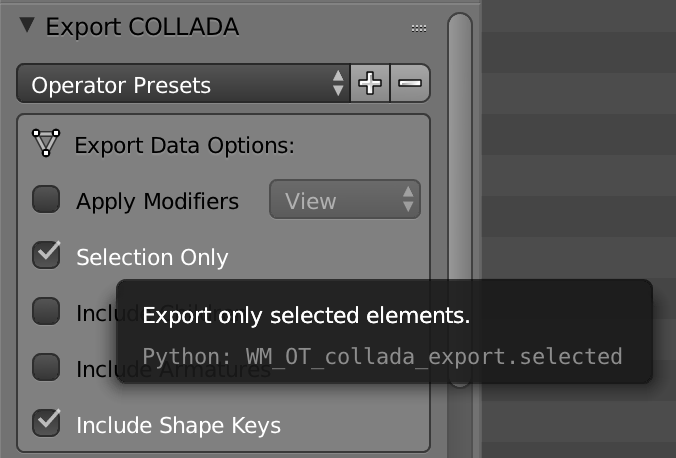
Select an appropriate path, and hit the Export COLLADA button in the upper right corner. Once exported, you’ll find your exported DAE file alongside its texture if it has any. You even get a nice preview with QuickLook.

2. The .dae file
The .dae file format (or COLLADA file) has been defined by the Collaborative Design Activity. It’s as simple as an XML file defining various characteristics of your 3D object.
You’ll find various libraries in the file, which will be used to describe the scene. For instance, we’ll find library_images to reference our texture,
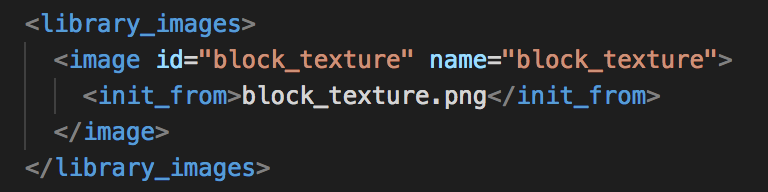
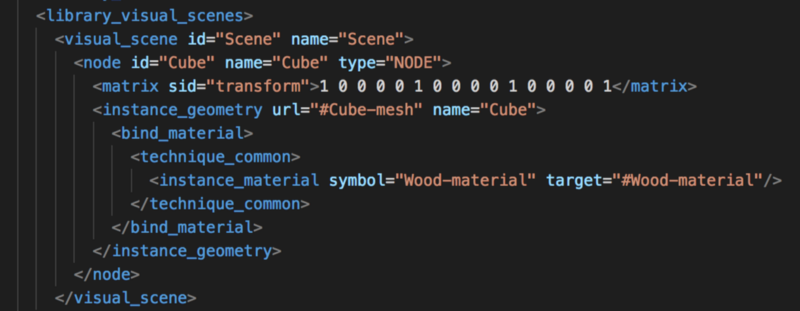
library_materials which references our texture and effects, library_geometries which declares the available geometries, and library_visual_scenes section which holds our scene elements, referencing needed materials and geometries.
There are other subsections which I needn’t cover here. Feel free to open the .dae file with your favorite text editor to check them out for yourself.
3. Import in Xcode
One important thing to know when using Blender to model 3D objects is that it uses a different coordinate system than Xcode:
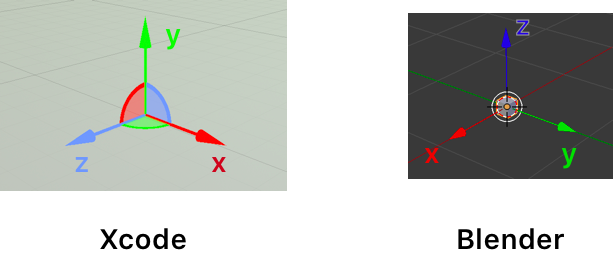
In Xcode, the Y axis describes height, while the Y axis in Blender describes depth (and the inverted observation applies for the Z axis).
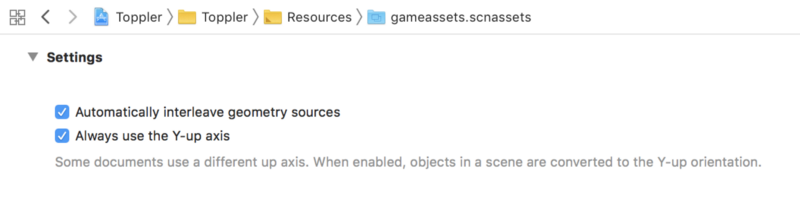
Thankfully, Xcode knows how to handle such discrepancies between coordinate systems. If you look at the scnassets resource folder in Xcode, you’ll notice the option to “Always use the Y-up axis” which means:
Xcode will enforce its own coordinate system, and will convert any object which uses a different one.
Now, simply drag and drop the .dae file, and its texture in the .scnassets folder. Xcode will automatically convert it with the appropriate axis settings, and you’ll be able to open it and preview your 3D object using the Xcode Scene Editor.
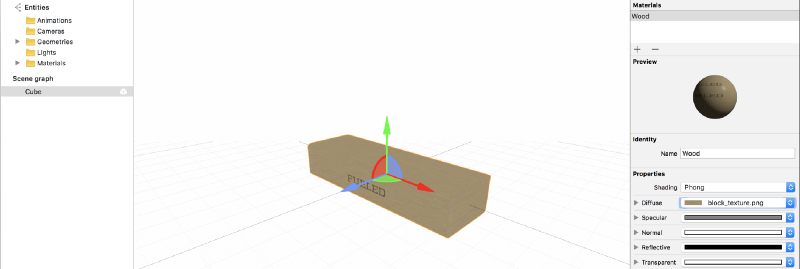
If you end up moving the texture .png file to a different location, make sure to assign it back to the needed material using the Material Inspector.
4. Convert to .scn
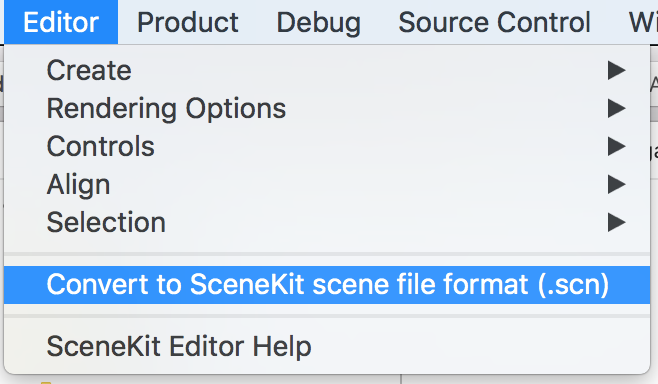
If we want to alter the physics behavior of our 3D object using the Scene Editor (or any SceneKit specific setting), we will need to convert our model to a .scn file. While previewing your model in Xcode, hit the Editor menu, then Convert to SceneKit scene file format.
And there you go! You’ll end up with a .scn file, ready to be used fully in SceneKit. Now you can drag and drop it into another scene, or you could import it by code and add its root node to a parent SCNNode.
By importing and using our .dae model from Blender to Xcode, we were able to move forward and build an awesome augmented reality game. However, we encountered many other roadblocks creating Toppler, one of them was to find a way to instantly update the block material to reflect its highlighted state (ready to be grabbed and moved), with a minimal performance cost. But we’ll keep this issue for another post, stay tuned!