
In the previous post, we did a basic setup of our Django based project to help us on our path for becoming a multilingual Super Hero by setting up the internationalization and localization machinery. If you haven’t read it yet, I strongly encourage you to read that first.
In this post, we’ll see how we can support multiple languages for both static and dynamic data.
Static String Translations
We use static strings in our model names, field names, error messages etc. We use them in many places including Django templates, all our code files, including models.py Let’s see how we support translation in all those places.
Django Templates
Anything that should be translated in templates should be marked under trans or blocktrans.
To make the translation work, there is one more thing to take care of, and that is loading the internationalization i18ntag at top of every file that uses trans or blocktrans.
Let’s see it in some action in a dummy sign-up page made using templates.
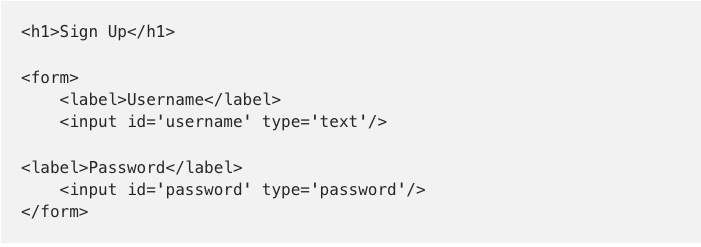
To enable translation and serve the sign-up page with static content (the field name, the text in the heading), we’ll first load the translation tag and mark the content for translation like:
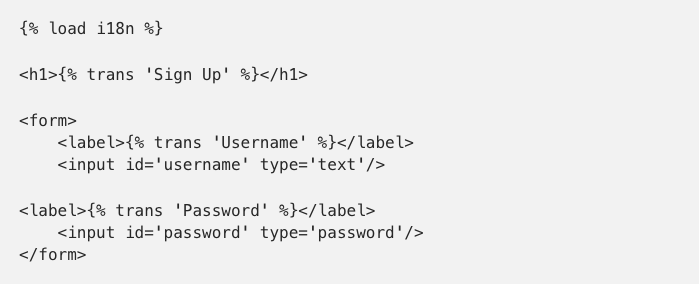
Gotcha #2: You need to load i18nin every file, even if it extends another file that already has it loaded.
All *.py files
In all files where you need the text translated, use ugettext orugettext_lazylike:
Both ugettext and ugettext_lazy are Python objects that are evaluated to string at different times. The string representation depends on whatever language is activated.
Oh, wait! How do I decide which one to use?
Great Question!
- Use
ugettextto immediately get the translated version of the text. For example, in yourviews.pyfile. - Use
ugettext_lazyto get a lazy object referencing the static string, for example, in yourmodels.pyfile.
Gotcha #3: Try to use ugettext_lazy over ugettext as much as you can, in all cases other than the case mentioned above, which requires returning the response in the API call, where an immediate translation is needed.
Generating translation files for static strings
Now that we’ve all the static data marked with trans tag, ugettext and ugettext_lazy methods, it’s time to generate the translation files and fill in the translations. For generating the django.po file for simplified Chinese, we’ll run the following inbuilt management command makemessages:

Gotcha #4: makemessages command accepts a flag i which excludes certain locations, like for the virtualenv, otherwise, django.po files are generated for each package in your virtualenv.
Gotcha #5: Notice that when you mention a language in settings, it is all in small letters like zh-cn but when you do it with the makemessages command, the language part is in small letters and country part is in capital letters separated by an underscore rather than a hyphen like zh_CN. If you make a mistake here, you won’t see any error and your translation won’t work either, which can leave you baffled and probably pulling out your hair.
Now, if you observe in your Django project, you’ll have few directories & files generated automatically, like this:
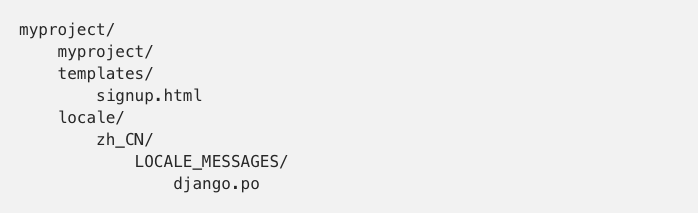
Now, let’s take a look at the django.po file that was created by the makemessagescommand:
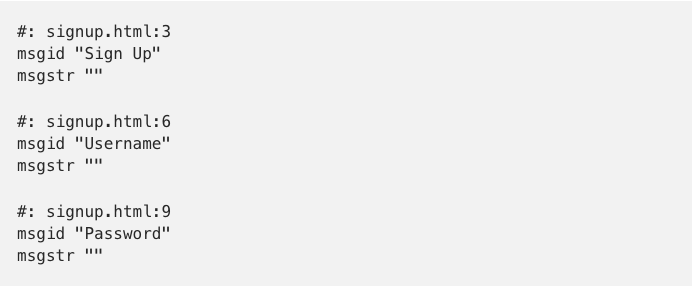
Here msgid is the text marked for translation and msgstr in it’s translated form. You’ve to do this for all languages you want to support in their separate django.po files. Let’s fill this in with Simplified Chinese as:

Now, we’re ready to compile all these translations to make them available everywhere a string is marked to be translated.
Compiling the static translation messages in Django
Once you’ve generated the django.po files, you can fill in the translations and then compile these *.pofiles to *.mo files to be used by Django.

Gotcha #6: Your best bet, is to move your virtualenv out of your project. Because of compilemessages finding all the django.po files from the root of your Django project, it may start converting django.po files from external dependencies, which can cause a lot of pain in getting up and running with actual translation of your project.
Gotcha #7: After compiling the messages, you must restart your wsgi server, or else the translation won’t work 😉
Dynamic String Translations
Most of the data in our Django application is dynamic and user generated. We can employ two approaches in order to support translations:
- Enable the end-user to enter information in multiple languages.
2. Translate the dynamic text with the use of third-party services like Transifex.
Let’s see the first approach in action.
Model Fields
The tricky part begins here. Now you want to support multilingual data in your database. For now, let’s assume that the user can input in just two languages. Say Chinese and English for simplicity.
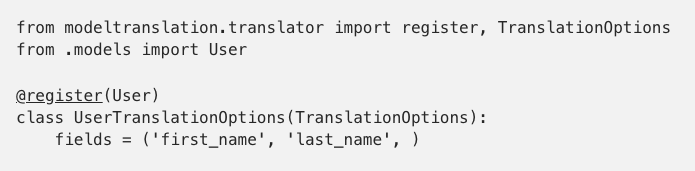
We can use the django-modeltranslation package here which will create different columns for attributes that are marked for translation. The code is very similar to what you write for django-admin for any data model in your app.
So, let’s assume that we have a model named User in our dummy app which has the first_name and last_name marked for translation in the translation.py file.
As soon as you do this in your translation file and run migrations, it will automagically create fields in your model. Here’s how the SQL dump would like:

Here, first_name is the default field that was defined on the model, which tends to store and retrieve the value of first_name for the default language set in your Django app (English in this case). For each subsequent language, that your Django project supports, a new field with the same name appears, suffixed with language code is created, like first_name_zh_cn for keeping Simplified Chinese version of the first_name field.
What if you don’t want to burden the user with adding information in multiple languages?
You can use a third-party service such as transifex, to convert all the incoming text in different languages.
BONUS
Since you’re still reading this, here is a bonus on debugging translation issues for you.
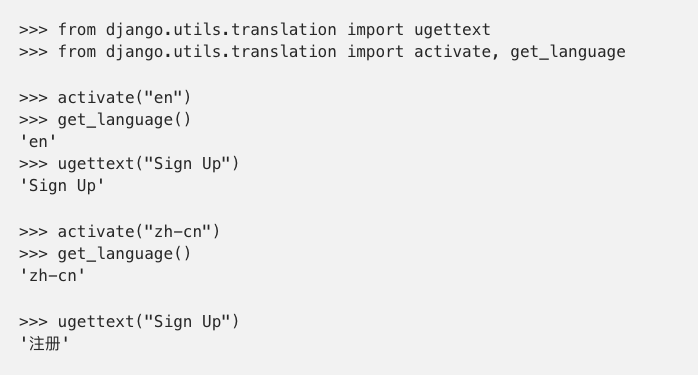
Gotcha #8 With Django shell, you can quickly activate a particular language and check if the static data from a django.po file is being translated like:

Gotcha #9: Oh, but looks like the translation is working just for some string and not all of them. What should I do?
Check in your django.po file, and if the translation is marked as fuzzy, just remove that line, compile the messages again and watch the magic happen right before your eyes 😀
NowYou Are A Django Superhero
Django’s translation support is indeed very powerful, but the initial setup becomes a bit of pain due to simple gotcha moments that can cause a lot of headaches (and sometimes pulling out your hair :P)
The earlier you support your project in different languages and write code correctly, the easier it will get in the future to support multiple languages.