Article in Mobile App Development, Mobile categories.

Writing Performant Layouts

how complex layouts can cause this janky behaviour, how to diagnose it, and then finally some tips on writing efficient layouts.

Writing Performant Layouts

With the ever-increasing complexity of mobile applications, you would always want to avoid user reviews like “this app is janky” or “it is too slow on my device”. So today we are going to learn about how complex layouts can cause this janky behavior, how to diagnose it, and then finally some tips on writing efficient layouts.

Layouts Matter

The refresh rate of most android devices is 60fps, so we have only 1/60 = ~16 milliseconds to render a single frame to avoid any janky behavior in the app. So the optimization of even 1 millisecond can provide huge gains.
When your app processes an object for layout, the app performs the same process on all children of the layout as well. Typically, the framework executes the layout or measure stage in a single pass and quite quickly. However, some more complicated layouts may have to iterate multiple times on parts of the hierarchy that require multiple passes to resolve before ultimately positioning the elements.

Having to perform more than one layout-and-measure iteration is referred to as DOUBLE TAXATION.

double taxation diagram
Double Taxation: every child gets measured twice in a nested hierarchy

Let’s take a quick look at some scenarios that lead to double taxation:

  • A LinearLayout with layout_weight needs each child to be measured twice
  • GridLayout with weights or fill gravity makes it lose all the pre-processing benefits
  • RelativeLayout always takes at least 2 passes

Now the question arises as to why nesting of layouts is bad? Imagine having a nested layout hierarchy in a RecyclerView item; the cost now gets multiplied by the number of items and that’s what can lead to the rendering time of a frame exceeding this 16-millisecond window.

Diagnosing the problem

Here are some tools that can help you diagnose the problem:

  • Layout Inspector: provides a visual representation of your layout hierarchy in the component tree that can be used to determine the depth of a particular layout, thus eliminating unnecessary parent view groups.
  • Lint: comes with a bunch of useful rules that can highlight the layout issues and provide useful suggestions to fix them as well.
  • Systrace: helps you to see all the processes running in the application in the form of graphs. These can guide you to the processes which are taking more than usual time to execute. For layouts, we want to make sure that the draw, traversal, measure process is completed within the 16ms window.
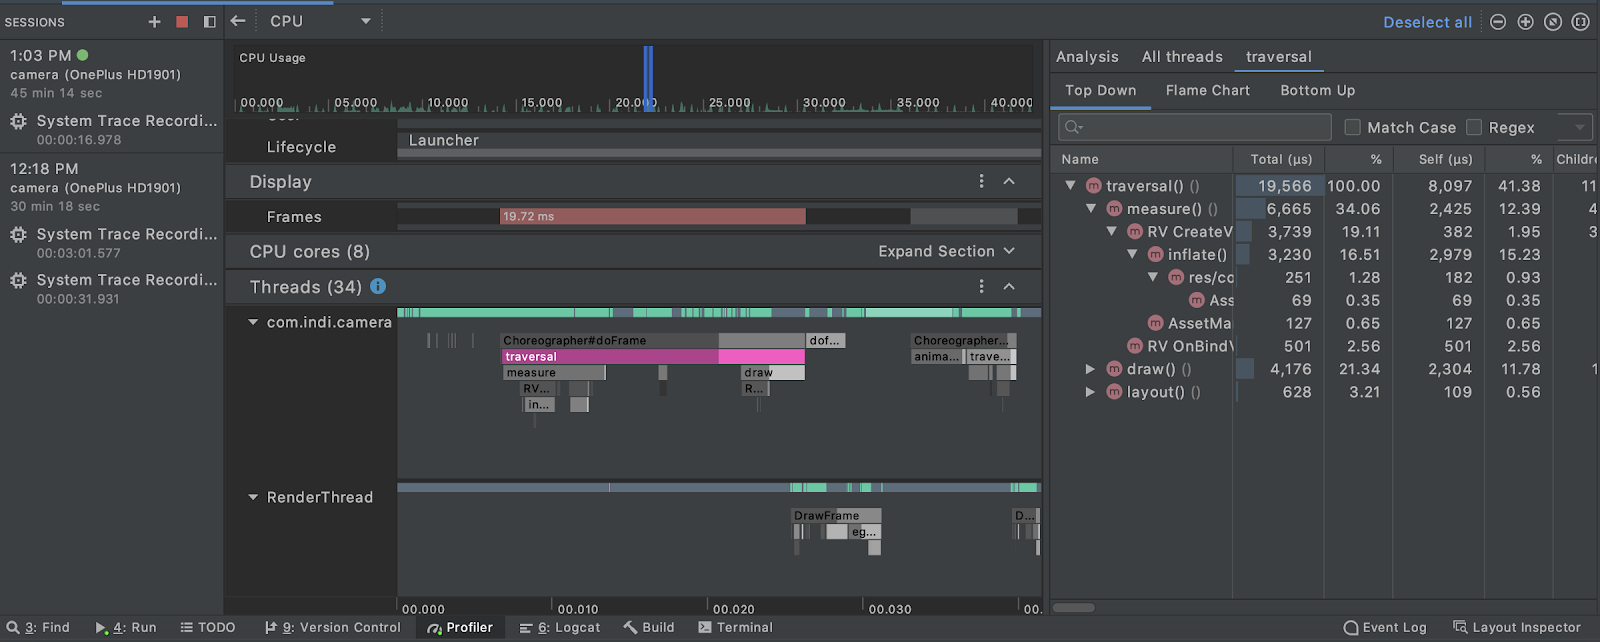
  • Android Profiler: one of the best tools that helps you gather a lot of information about what happens in your app behind the scenes; in the form of a graphical representation along with a mapping of the time taken by various processes to finish. It also allows you to capture traces in the app, very similar to systrace. To optimize layouts, monitor the CPU usage, and look for red frames in the graph, those are the ones causing janky behavior.
profiler graphs
A screenshot of how profiler graphs look like, I have zoomed in on a dropped frame that you can see represented by the red bar

Let’s take a look at a few things we can do for optimizing layouts.

Reusing layouts

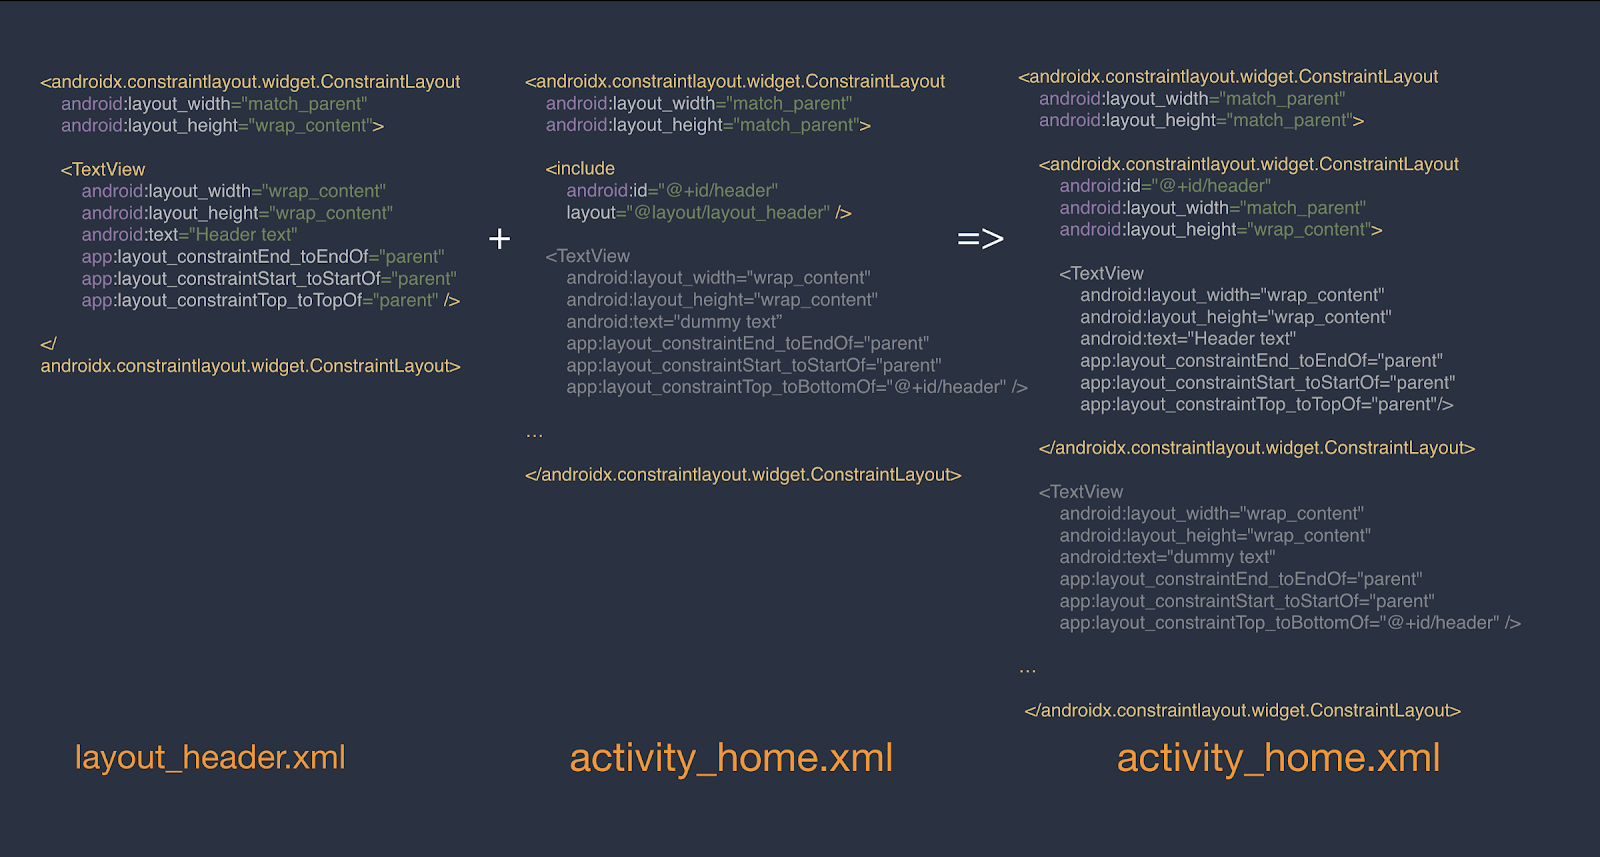
Using the  <include> tag is a very common practice. However, it can lead to unnecessary nesting. Let’s see how.

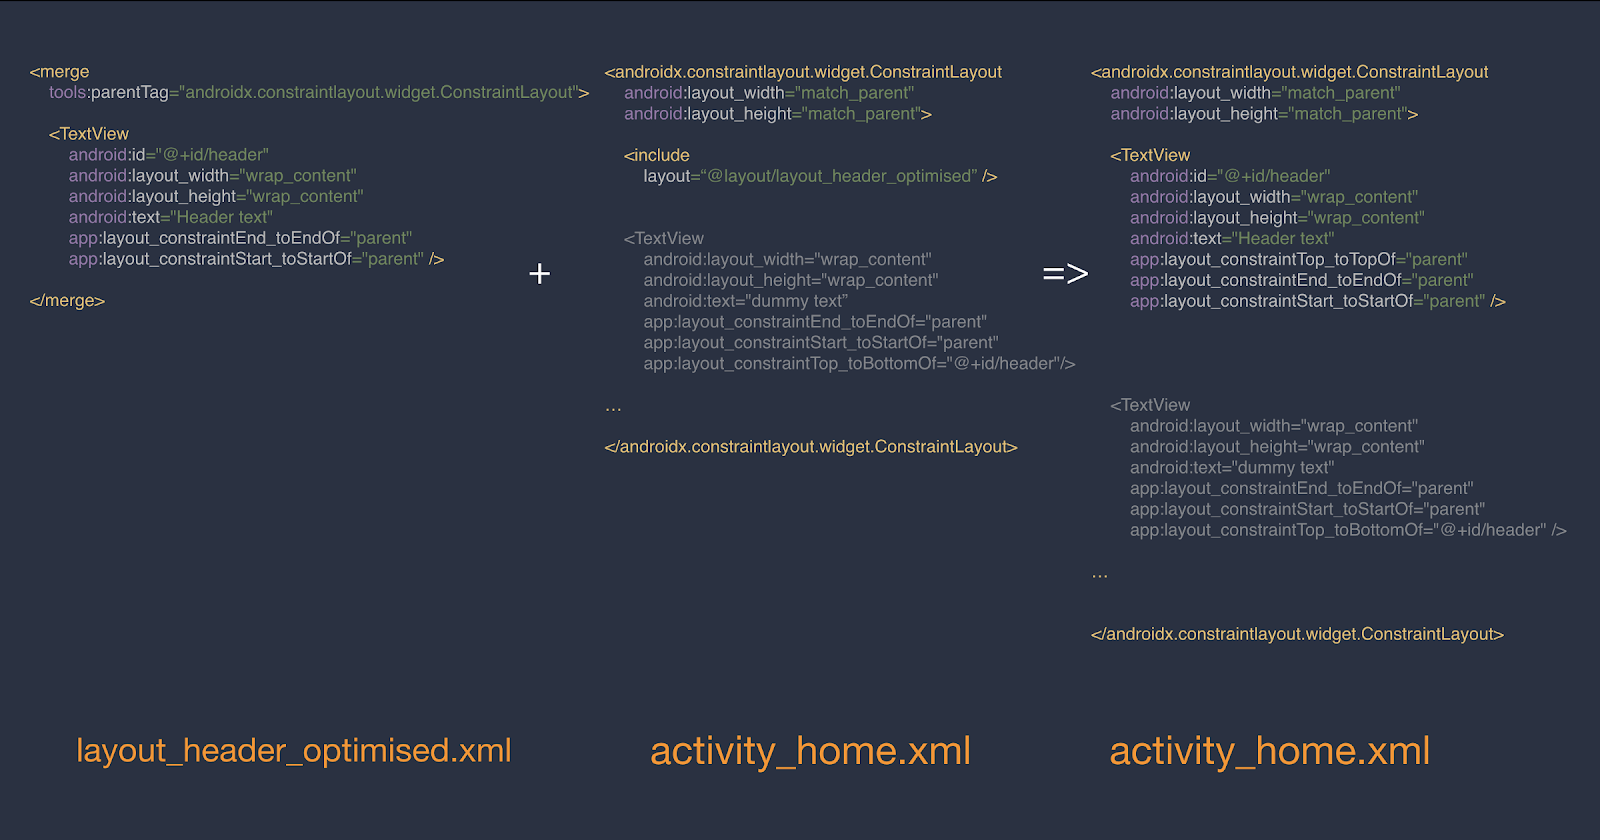
Say you defined a reusable header layout and used <include> to add this layout to an activity. We achieved code readability and reusability here—great! Let’s see how the system interprets it: the compiler replaces the <include> tag with the layout file, so we get nested Constraint-Layouts in this case.

Demonstrating nested behaviour using <include> tag
Demonstrating nested behavior using include tag

There is a very quick and simple way to avoid this nesting by using the <merge> tag. Just replace the ConstraintLayout in layout_header.xml with the <merge> tag. To see how your views would be aligned when this layout is included in a parent layout (activity_home.xml) you can use tools: parentTag attribute to specify the parent ViewGroup in which this layout would be included, that’s it! This will make the UI in the editor look like it would when included in the specified ViewGroup.

The layout_header_optimised.xml is included the same way we included layout_header.xml earlier.

Let’s see how the system interprets it: the compiler places all the elements (header <TextView> in this case) wrapped inside the <merge> tag directly in the layout, in place of the <include> tag. The nested Constraint-Layouts we saw earlier are now gone. Poof! That’s the magic of the <merge> tag.

using merg tag
Demonstrating optimized layout using merge tag

Adopt a cheaper layout

Sometimes double taxation and nesting come as a side effect of the parent layout you are using. Choose parent layouts wisely. As a rule of thumb I tend to follow these guidelines:

  • Complexity → ConstraintLayout
  • Stacking elements vertically/horizontally → LinearLayout
  • Placing views on top of each other to create an overlay → FrameLayout
  • Avoid using RelativeLayout

“In the N release of Android, the ConstraintLayout class provides similar functionality to RelativeLayout, but at a significantly lower cost.”

Delay Loading of Views

Sometimes your app uses layouts with views that are not visible on the screen when the layout is inflated. These are the views that you might want to show in the future based on user interactions. Some of the examples could be progress indicators, undo messages, item details. You can render them only when required. This will reduce memory usage and speed up rendering of the layout. How do we do that? You can defer the loading of views by using a ViewStub.

ViewStub is a lightweight view with no dimension that doesn’t draw anything or participate in the layout. As such, it's cheap to inflate and cheap to leave in a view hierarchy.

Using ViewStub is simple, you can just replace the <include> tag in your layout with ViewStub and specify an inflatedId that would be used to refer to the inflated layout when ViewStub is loaded.

Replacing <include> with <ViewStub>
Replacing include with ViewStub

Loading ViewStub

When you want to load the layout specified by the ViewStub, either set it visible by calling setVisibility(View.VISIBLE) or call inflate(); however, the inflate() method has the benefit of returning the root View of the inflated layout.

code

It is very important to remember that after the stub is inflated, the stub is removed from the view hierarchy. So a reference to progress_stub would now return null. A ViewStub is a great compromise between ease of programming and efficiency. The only drawback of ViewStub is that it currently does not support the <merge> tag.

Conclusion

Let’s jot down the things we have read so far into actionable items:

  • Profile your code and look for red frames
  • Avoid nesting using <merge>
  • Use cheaper layouts: make ConstraintLayout your best friend
  • Delay loading of views using ViewStub

All good things come at a price

Optimizing layouts is rewarding for complicated applications but there are a few pain points that make it overhead for simple apps with less complex layouts. So keep in mind the following points before you delve deep into optimizing your layouts:

  • Data binding support is not available out of the box for <merge> tag
  • ViewStub is useful only when you don’t want that layout immediately on the screen which serves very few cases
  • Profiling code is easier said than done

While Android development is moving towards an xml-less direction with Compose, it might help to keep these tips in mind until you can completely purge xml from your codebase.

Thanks for sticking around till the end, hope you learned something! 👋

More Articles By bhavya

Recent Articles

Previous post The No-Nonsense Recorder Your iPhone is Missing July 22, 2020
Next post Camo is the convenient, pro-quality webcam app you need while working from home July 29, 2020